> ## Documentation Index
> Fetch the complete documentation index at: https://hoopdev-docs-changelog-1-43-2.mintlify.site/llms.txt
> Use this file to discover all available pages before exploring further.
# Docker
> This deployment leverages `docker compose` to deploy Hoop on local or remote machines for solution assessment.
## Supported Operational Systems
Tested on MacOS, Ubuntu 24.04 and Amazon Linux 2
Intel based and Apple Silicon (M1/M2) Macs
## Required tooling
Install or update to Docker version 20.10.0 or greater
Install or update Docker Compose to version 2.11.x or greater
Run `docker compose version` to check which version you have installed
It comes installed with Docker engine, but you can also do the standalone installation
No need to install, it comes with Docker Desktop for MacOS
## Download & Run in your machine
This simpler version doesn't require much configuration, it just runs in your localhost.
```sh theme={null}
touch .env && curl -sL https://hoop.dev/docker-compose.yml > docker-compose.yml && \
docker compose up
```
This will download the docker-compose file and run it in your local machine. You can access it at `http://localhost:8009` in your browser.
If you want to set up a custom Identity Provider or run it in a remote machine, follow the **Download & Run in a remote machine** guide below.
## Download & Run in a remote machine
```sh theme={null}
curl -sL https://hoop.dev/docker-compose.yml > docker-compose.yml
```
This step is required for authentication mostly, but a lot more configurations can be added to your `.env` file.
Check all the available configurations in the [environment variables section](/setup/configuration/env-vars).
The `.env` file must be at the same level as the docker-compose.yml file
The local provider is the default, it allows accessing the developer portal with password based authentication.
* Create an `.env` file to add the following configuration lines for your host configuration
```sh .env theme={null}
# the API_URL and GRPC_URL are the host where
# the Hoop API and GRPC services are running
API_URL=http://:8009
GRPC_URL=http://:8010
```
Setting up your Identity Provider is a bit more complex, but it's a one-time setup. If you don't have admin access to your Identity Provider, you can use the default one provided by Hoop, which will make your life much easier to get to know hoop.dev.
Below you can see an example of how to set up the .env file with the Identity Provider values. See our [Identity Providers section](/setup/configuration/idp) for more information on how to obtain these values.
```sh theme={null}
cat - > .env <
IDP_CLIENT_ID=
IDP_CLIENT_SECRET=
IDP_AUDIENCE=
# the API_URL and GRPC_URL are the host where
# the Hoop API and GRPC services are running
API_URL=http://:8009
GRPC_URL=http://:8010
```
Make sure to allow your Identity Provider to redirect to the Hoop API URL
If you can't access the developer portal from a VM, check your firewall rules and make sure the port TCP/8009 and TCP/8010 are open or to bind properly the ports inside your network so it can be accessible.
This process might take a few minutes to download the images and start the containers.
```sh theme={null}
docker compose up
```
To view the container logs:
```sh theme={null}
docker compose logs -f
```
To stop the containers:
```sh theme={null}
docker compose down
```
If you are running this on your local machine, access `http://localhost:8009` in your browser.
Or, if you are running this on a remote machine, access `http://:8009` in your browser.
If you can't access the developer portal from a VM, check your firewall rules and make sure the port TCP/8009 and TCP/8010 are open or to bind properly the ports inside your network so it can be accessible.
## Accessing and Getting Started with hoop.dev
Once you finish the setup, create an account and sign in to the developer portal, you will see this screen:
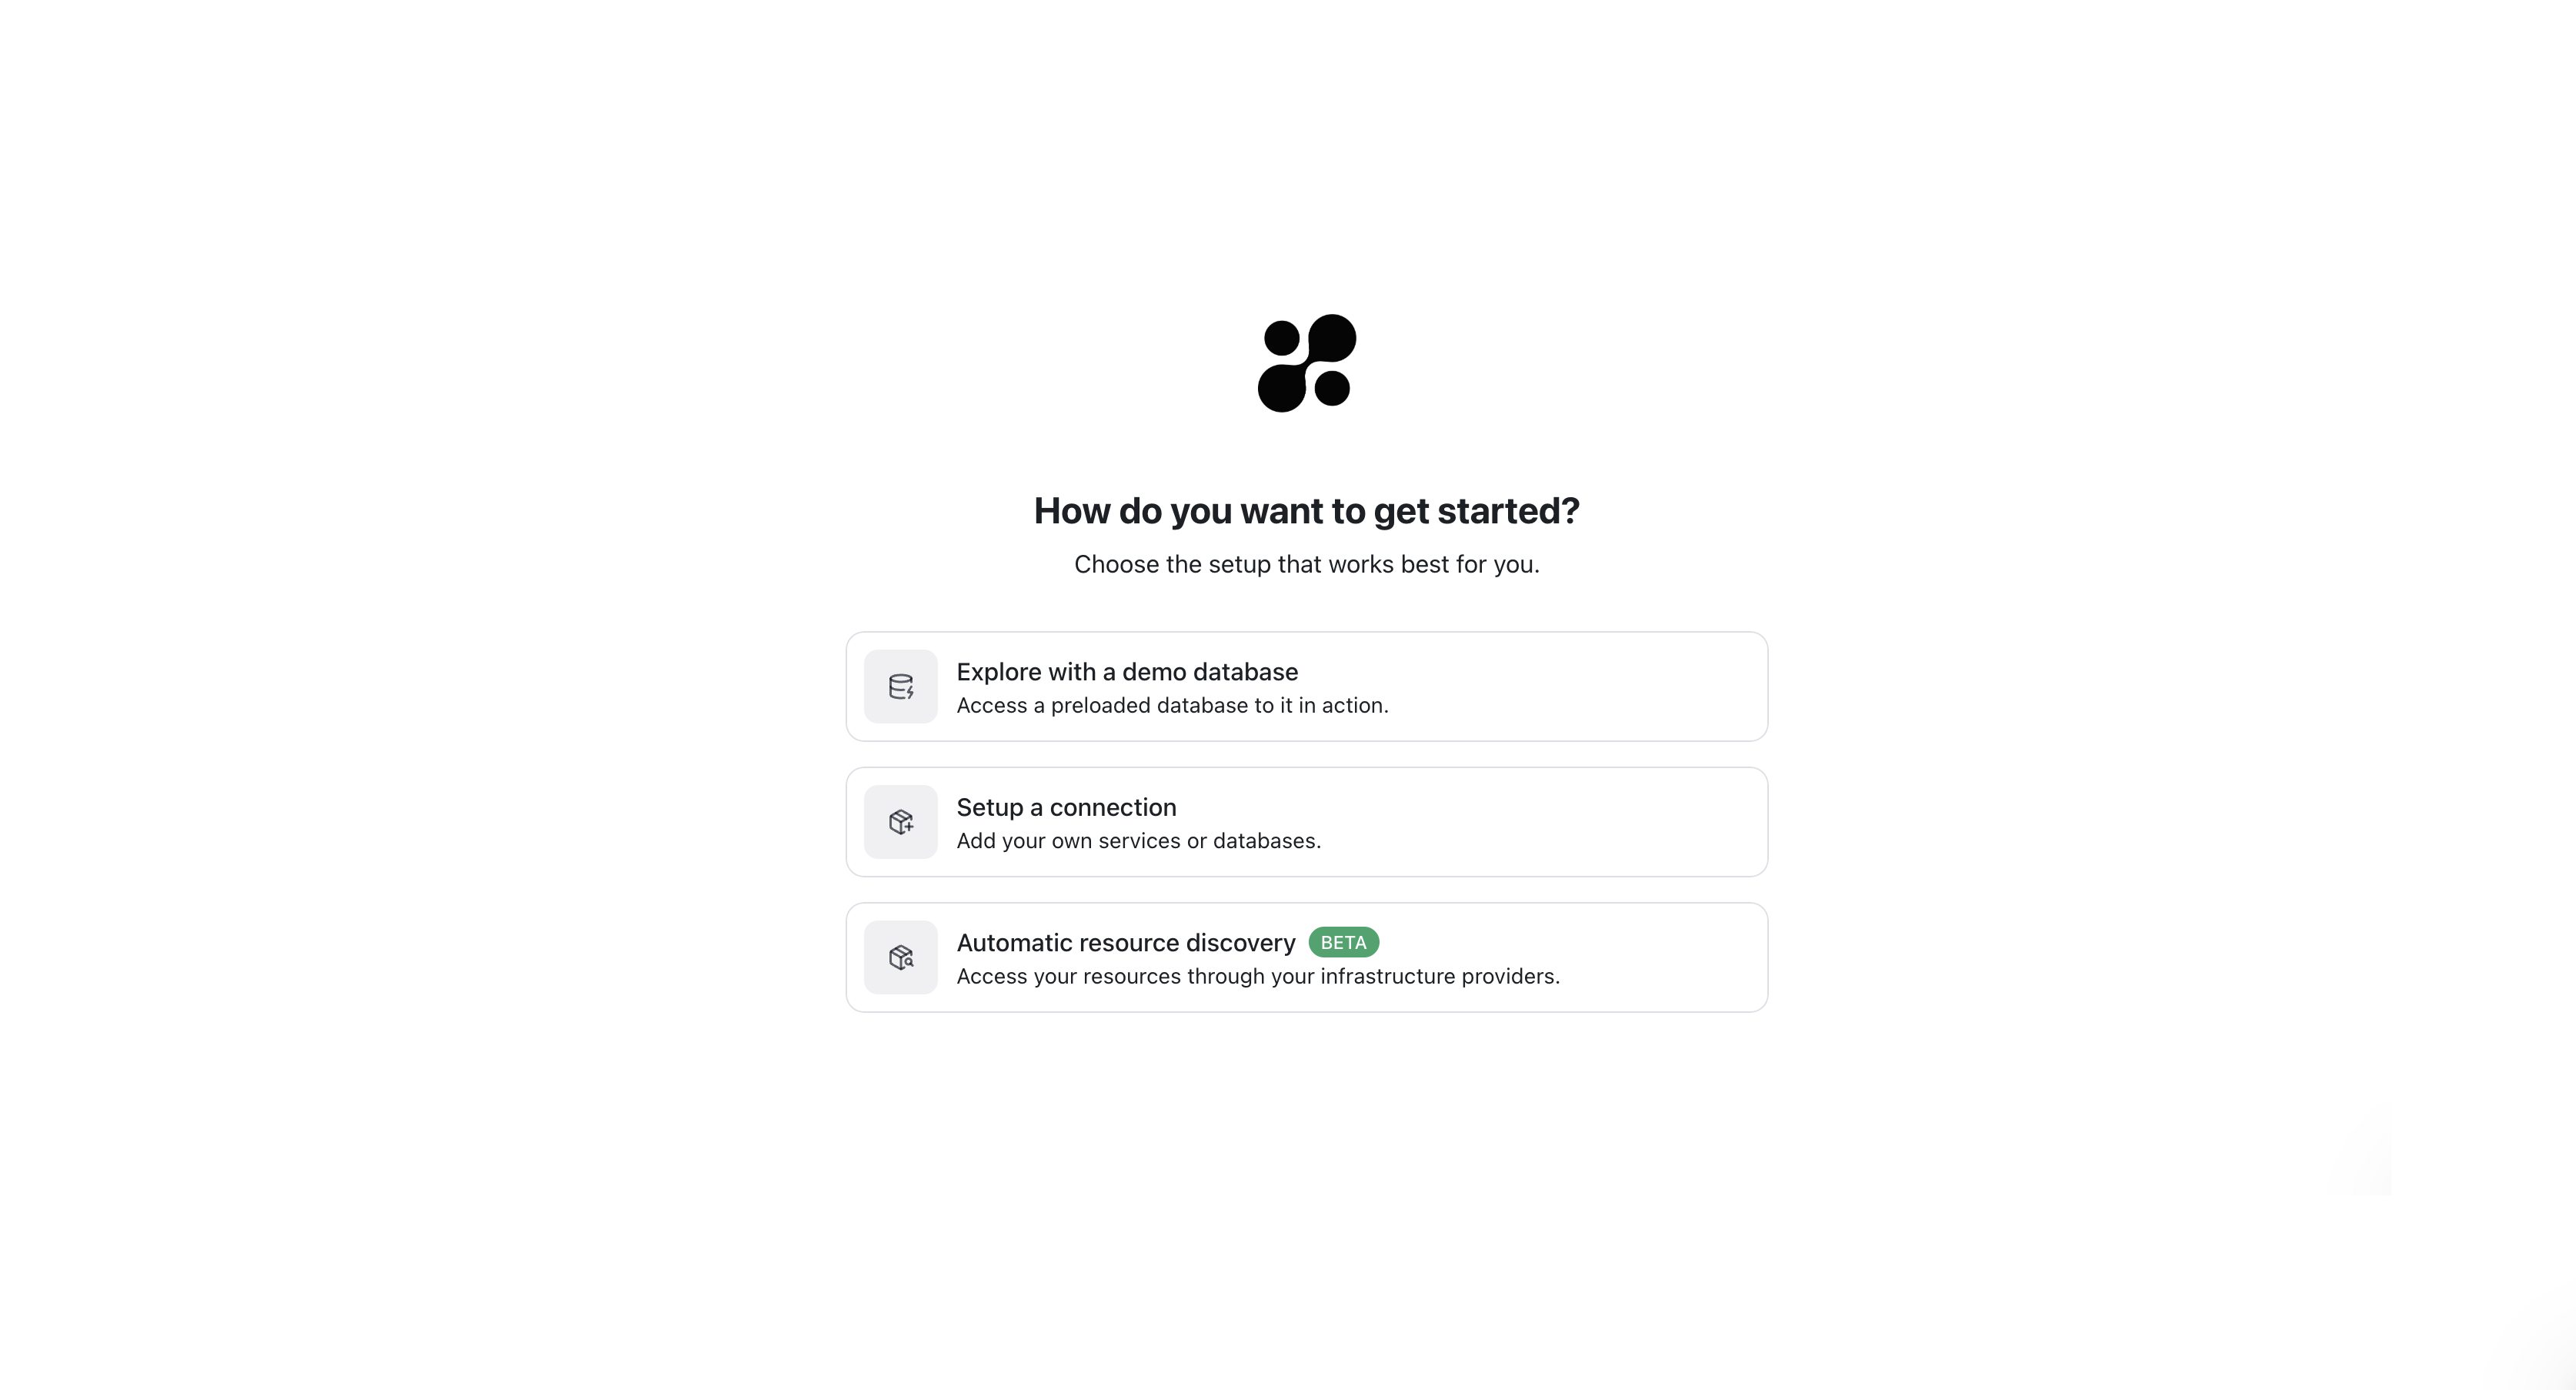 Click to **explore with a demo database** and you will be able to create your first connection and start exploring the platform.
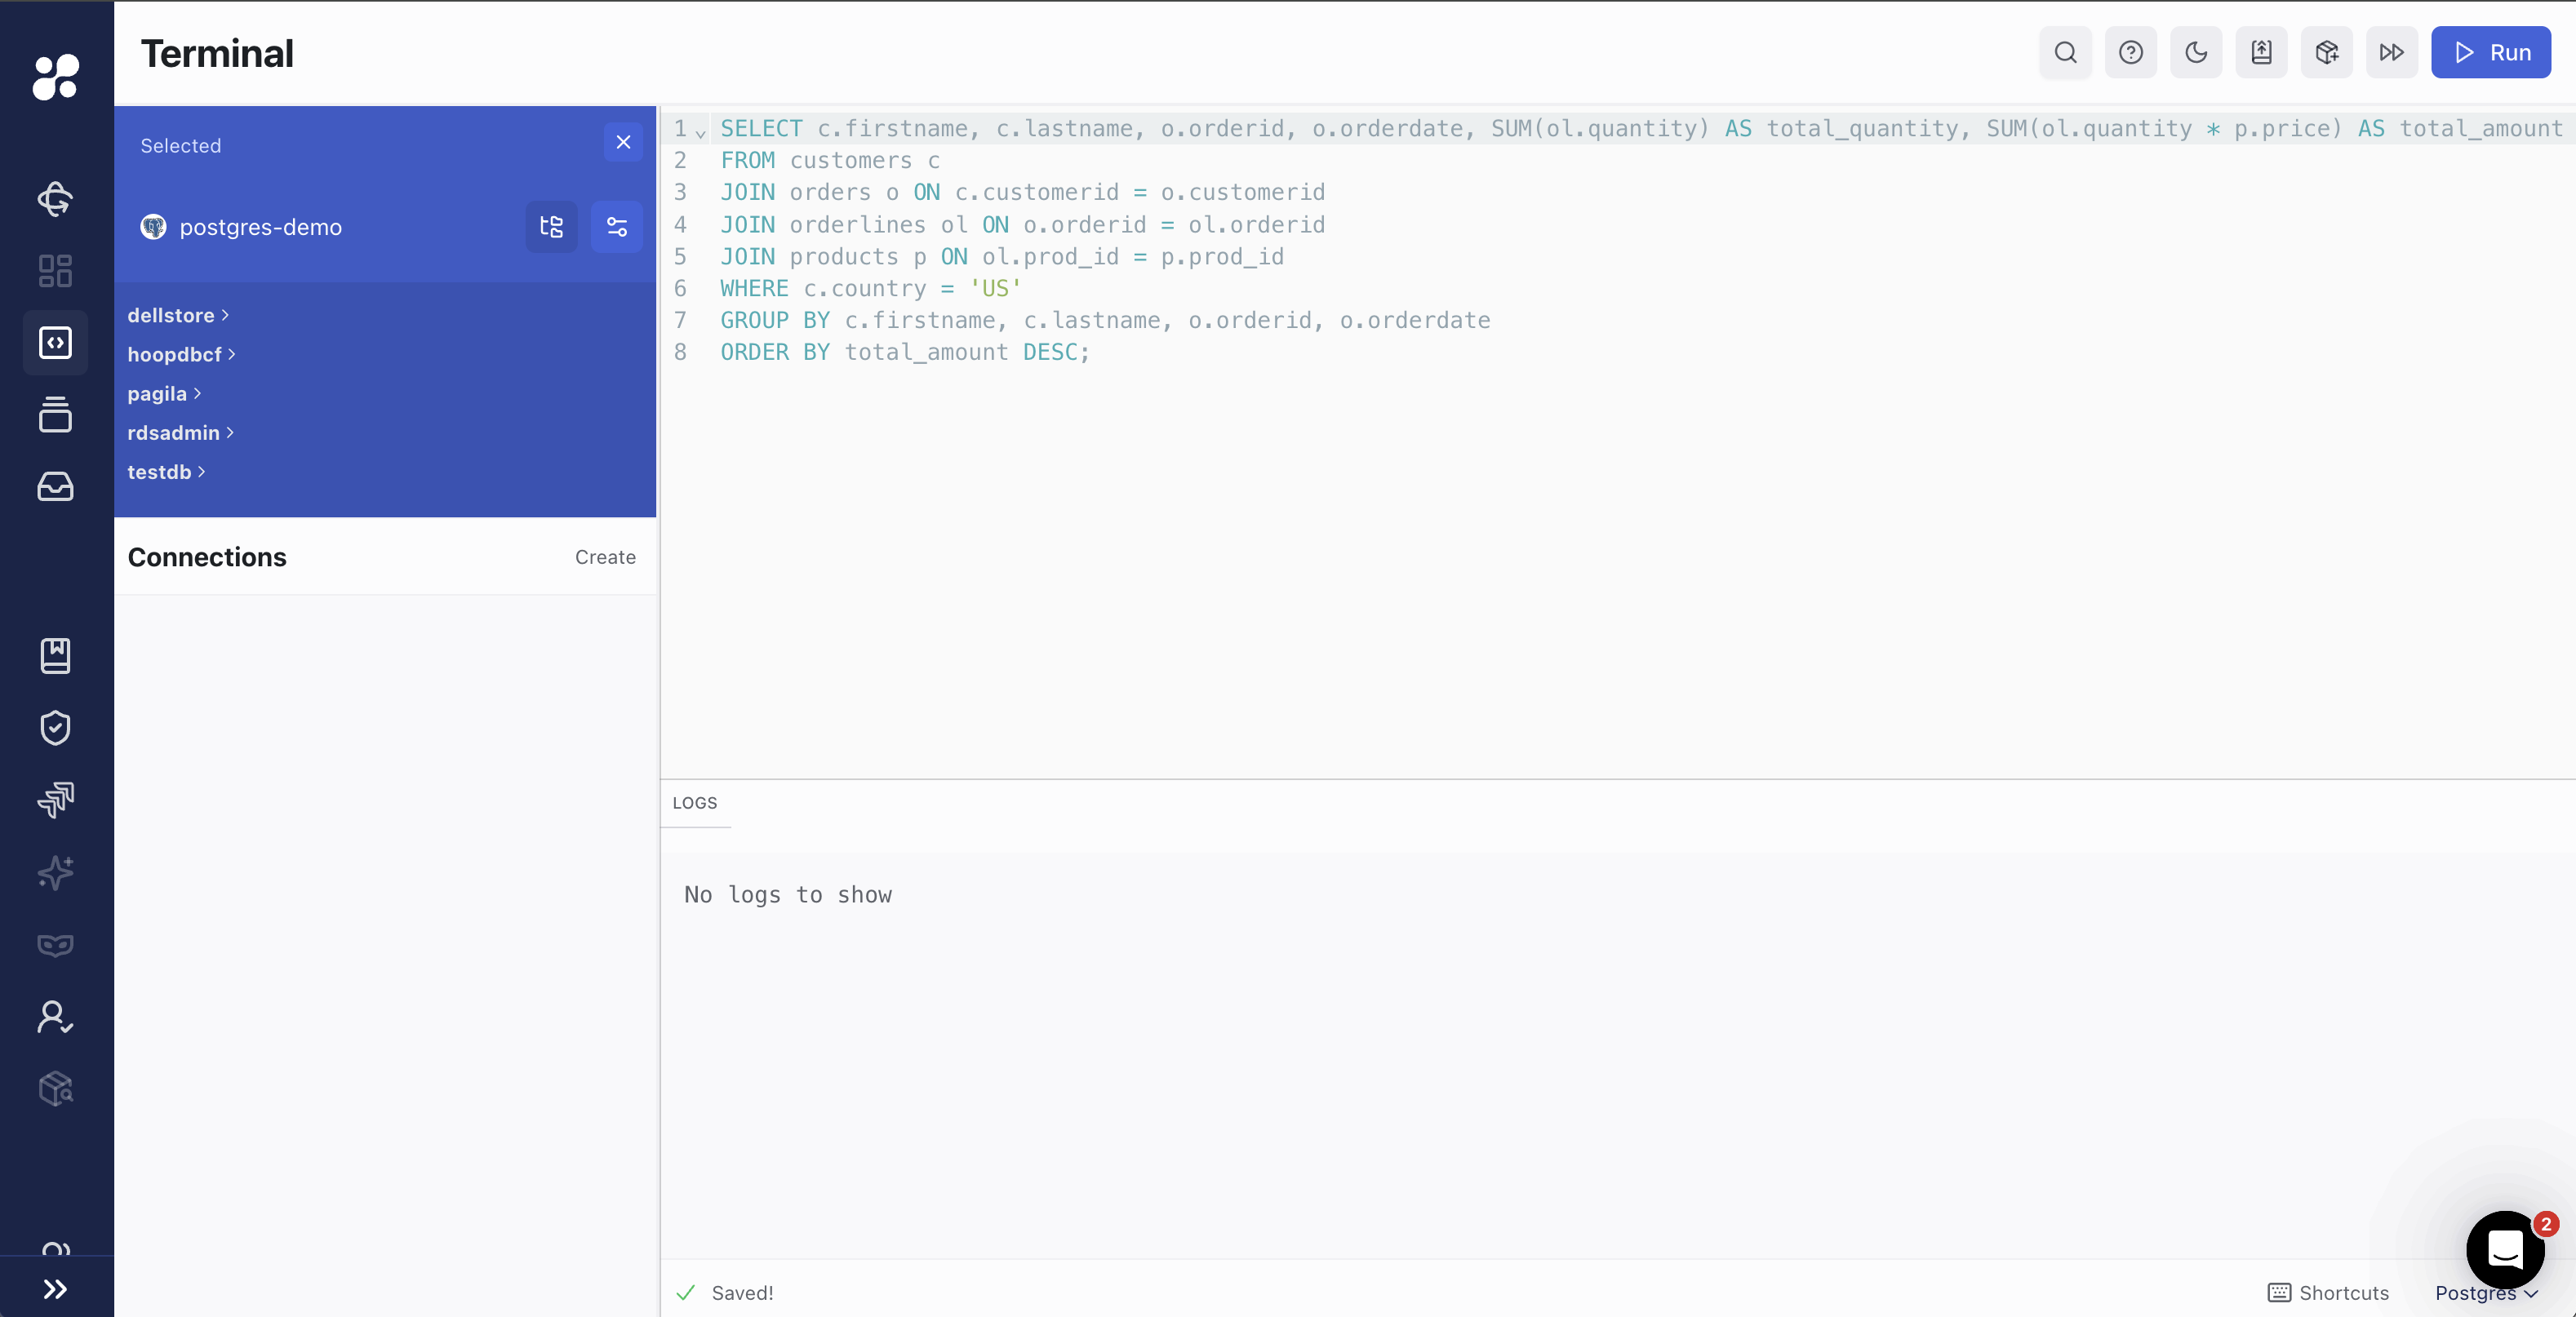
### Running Your First Query
Click in the **Run** button to execute the query and see the results.
Click to **explore with a demo database** and you will be able to create your first connection and start exploring the platform.
### Running Your First Query
Click in the **Run** button to execute the query and see the results.
 ***
You have successfully set up Hoop on your local machine or remote server using Docker Compose. Now you can start exploring the platform and connecting to your data sources.
## Troubleshooting
### Production Environments with API\_URL
When deploying Hoop using Docker Compose for Production Environments, it's usually important to configure the `API_URL` environment variable properly to ensure the web app assets are served correctly. Check the following steps to configure it:
In your `.env` file, the `API_URL` should include the complete schema (e.g., `https://yourdomain.com`). This will ensure that assets are served with the correct schema and domain.
Open your `.env` file and add the following:
```sh theme={null}
API_URL=https://yourdomain.com
```
Replace `https://yourdomain.com` with the full schema and host where you will serve the Hoop Gateway. If you encounter any issues after setting the `API_URL`, double-check your `.env` file and provide details about your setup for troubleshooting.
If the `API_URL` variable is not set manually, it will default to `127.0.0.1`, which serves locally inside your virtual machine. To avoid this and serve the web app properly over the correct domain, ensure you update the `.env` file with your intended domain.
If you configure the `API_URL` with an IP address and later use DNS port forwarding, the assets might not load correctly. The `API_URL` should reflect the full domain, not just the IP.
***
You have successfully set up Hoop on your local machine or remote server using Docker Compose. Now you can start exploring the platform and connecting to your data sources.
## Troubleshooting
### Production Environments with API\_URL
When deploying Hoop using Docker Compose for Production Environments, it's usually important to configure the `API_URL` environment variable properly to ensure the web app assets are served correctly. Check the following steps to configure it:
In your `.env` file, the `API_URL` should include the complete schema (e.g., `https://yourdomain.com`). This will ensure that assets are served with the correct schema and domain.
Open your `.env` file and add the following:
```sh theme={null}
API_URL=https://yourdomain.com
```
Replace `https://yourdomain.com` with the full schema and host where you will serve the Hoop Gateway. If you encounter any issues after setting the `API_URL`, double-check your `.env` file and provide details about your setup for troubleshooting.
If the `API_URL` variable is not set manually, it will default to `127.0.0.1`, which serves locally inside your virtual machine. To avoid this and serve the web app properly over the correct domain, ensure you update the `.env` file with your intended domain.
If you configure the `API_URL` with an IP address and later use DNS port forwarding, the assets might not load correctly. The `API_URL` should reflect the full domain, not just the IP.